This seems like the easy part of creating an invention center – you just get the supplies you need. The thing is, without a method to the madness, it’s just madness. So here are three plumb line questions to keep you stockpiling instead of just making piles.
Does the material fit into the goal of your invention center?
I know I haven’t brought up the term “goal” in the context of your invention center before, but if you’ve come this far, you probably have a good idea of what yours is already. (If you haven’t read the first two posts on creating an invention center, you can read what it is and Part 1 to get caught up.) If you’re woodworking, you’ll need wood, screws, a drill, etc.
This is the no-brainer stuff to have around. Without a stocked area, you’ll get bogged down looking for that lost paintbrush or copper wire. This is why we’re making an invention center.
How much do you need to get started?
Sometimes the zeal to create can take over, and you end up with a lot more than you need – especially if it’s freebie stock. Like toilet paper rolls. There are tons of art and engineering projects you can do with toilet paper rolls. But if you keep saving and don’t use them, well it can just start to get weird.
There has to be a FULL point. Then move on.
Did you throw a wrench in your plan?
If the answer to the last question is “nope” – then it’s time to find that wrench and throw it into the stockpile! Hear me out on this one. If you want to create a maker’s space, that’s great, but this is a defining moment for your invention center. You want to have something in your invention center that challenges you to break the mold. More than something. A fair lot of things. An acorn from last fall’s hike. A bunch of rusty nails. One red sock.
These are the grains of sand that help your creative oyster make a pearl.
Until next time,
Invent your story
April showers bring May flowers, and I’ve been in a flower-making frenzy all month. These pop can tulips are a unique way to kick off summer and jazz up any empty corner of the house or garden. Let’s get growing!
What you’ll need:
- A backdrop (I used painted 2×4’s)
- Pop cans (I used Coca-cola for the flower heads, and Verner’s for the green leaf cover)
- Aluminum foil
- Acrylic paint & brushes
- A sawtooth hanger (optional) & hammer
- Hot glue (I tried Elmer’s and even superglue, but I had the best success with hot glue)

Paint Your Backdrop
The first thing you’ll want to do is set the stage for your flowers. If you want to replicate a real flower (like the ones featured) be sure to consider the shape of the leaves that grow on the plant. Tulips have nice thick leaves, so they were easy to paint. I like to mix colors for variety, so I mixed yellows, blues, and greens together and accented the leaves with a metallic acrylic paint.

Twist Your Stem
After your leaves look the way you want, it’s time to make the stem. I ripped 3-4 inches of aluminum foil off of the roll and folded the edges in until I had a strip about 1 inch wide. Then, I started twisting in the middle of the foil all the way out to the ends. This created that nice 3D effect I was hoping for. You can also paint the stem if you want to – I did a light brushing with the metallic green.


Attach Your Sawtooth
If you plan to hang your artwork up, be sure you have the sawtooth hanger (or whatever works best for you) attached to the back before you glue the flowers on the front. Aluminum is fun to work with because it’s versatile, but it also can get bent out of shape, so planning ahead is great.

Cut Your Petals
I wanted a variegated look for my tulips, and the white swish on the coke cans was a perfect fit. It’s also one of my favorite beverages, so that’s fun. As you choose your colors/cans, look for a solid part that you can cut out and create a repeating pattern with. I used a Verner’s ginger ale can for the green leaf that covers the stem at the bottom of the flower.


Glue Your Flower
When your stem, leaf, and petals look the way you want them to, go ahead and glue it all in place! I started with the stem and attached it to the wood at the top and bottom of the twisted strip of foil. Next, I used the green leaf to cover the foil edge. Finally, I glued two tulip petals over the top of each foil stem. Holding the flower head in place and using a LOT of glue helped to secure the petals.

That’s it! Five easy steps to a foil flower frenzy. If you like this project, check out my first attempt at pop can art for a different spin. The best part about this artwork is each flower is unique. As your flowers come together, enjoy the fact that every one is an original work of art. Just like you.
Until next time,
Invent your story
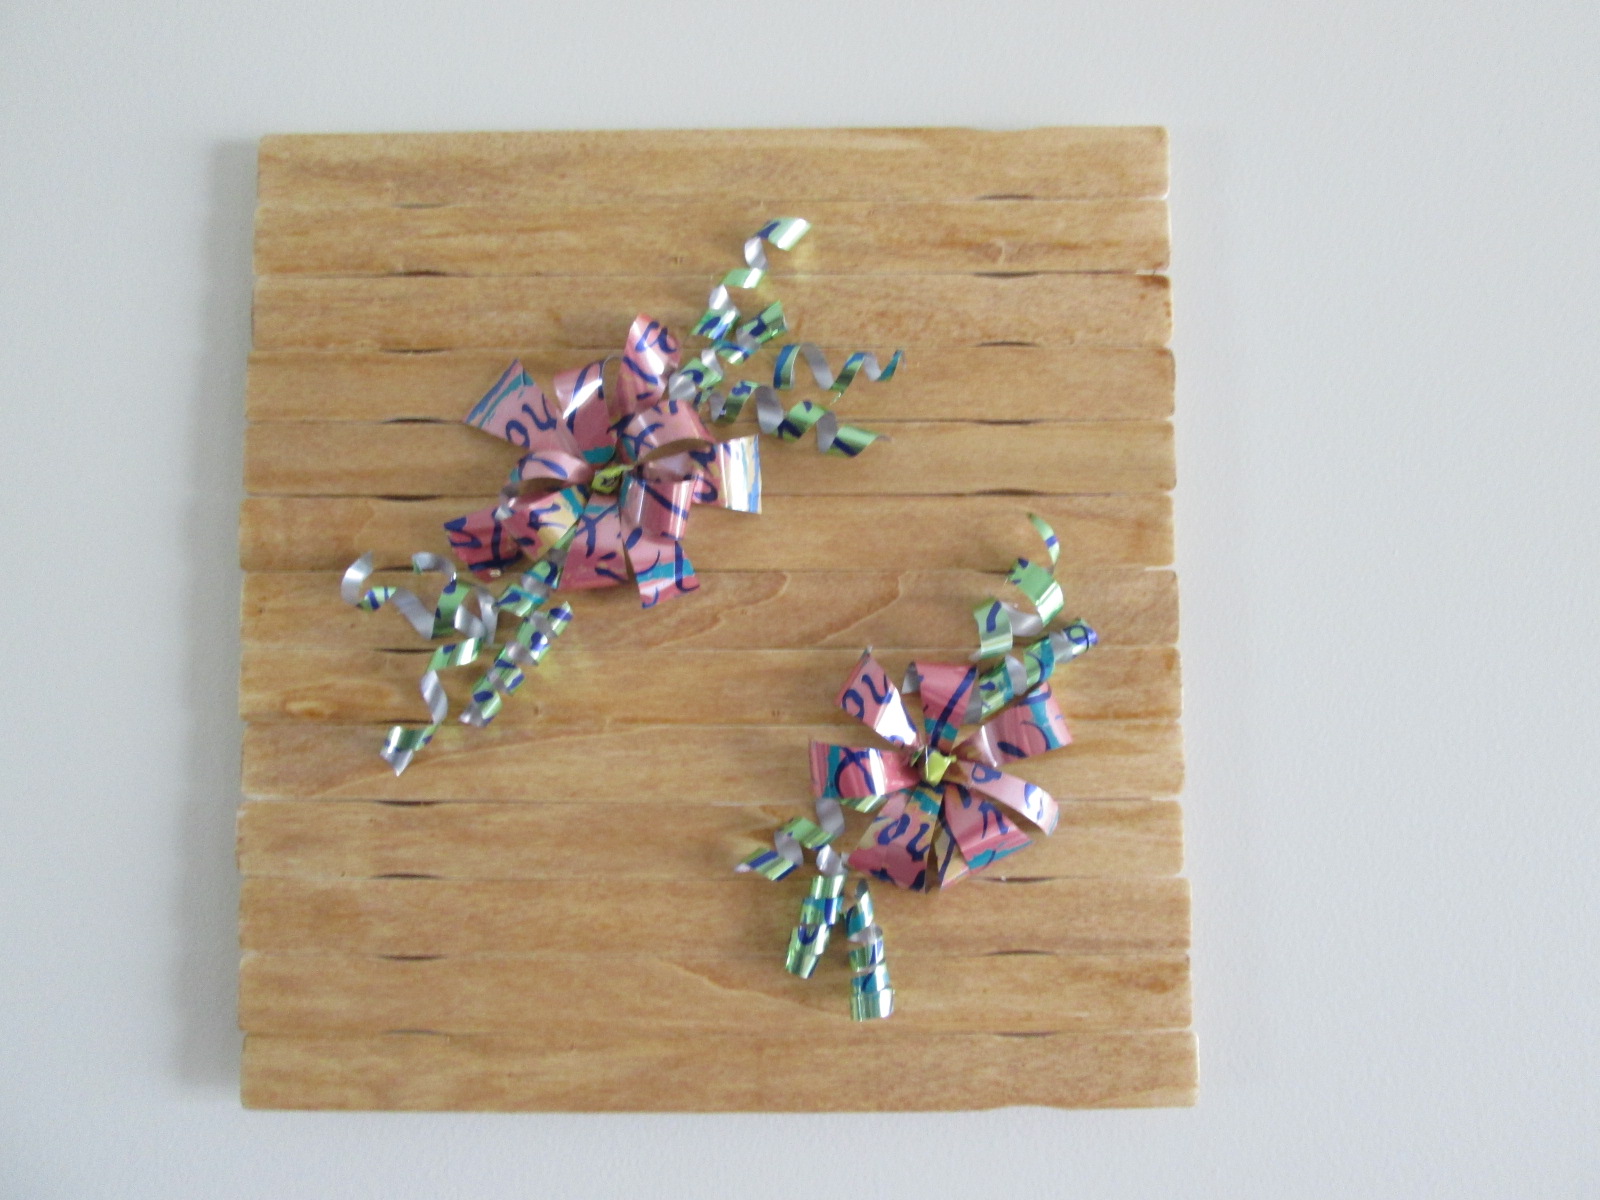
Welcome Inventors. What catches your eye? I love life’s unusual suspects. Metal art has texture and depth that appeals to me, so I set out to make the cheapest metal art ever.
I used four different kinds of La Croix carbonated water cans. The drink was tasty and the colors were cool – everybody wins! To make the simple paint stick backdrop, see my last post.

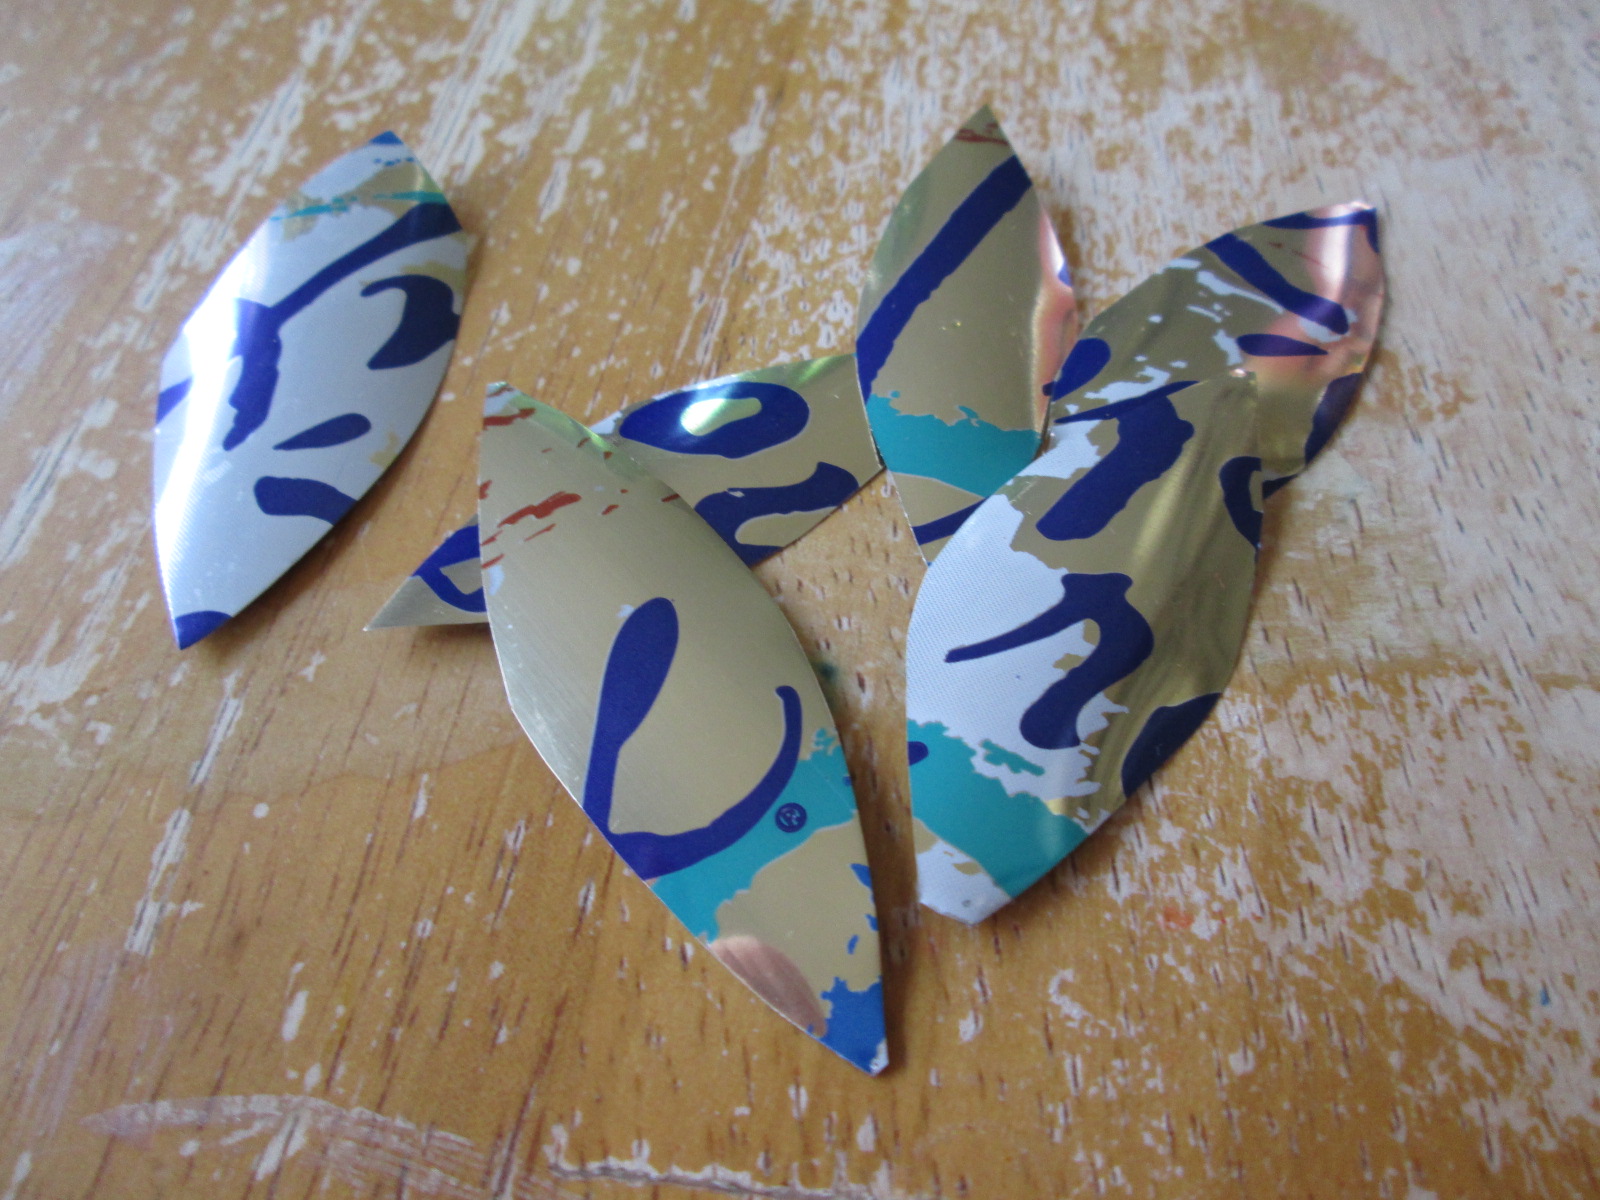
Step 1: Cut the Cans. Take a pair of sharp scissors and puncture the can, then cut the metal into your desired shapes. I like flowers and wanted a spring theme, so I made long, thin strips for green stems, and I cut fatter pieces in white and pink for petals.
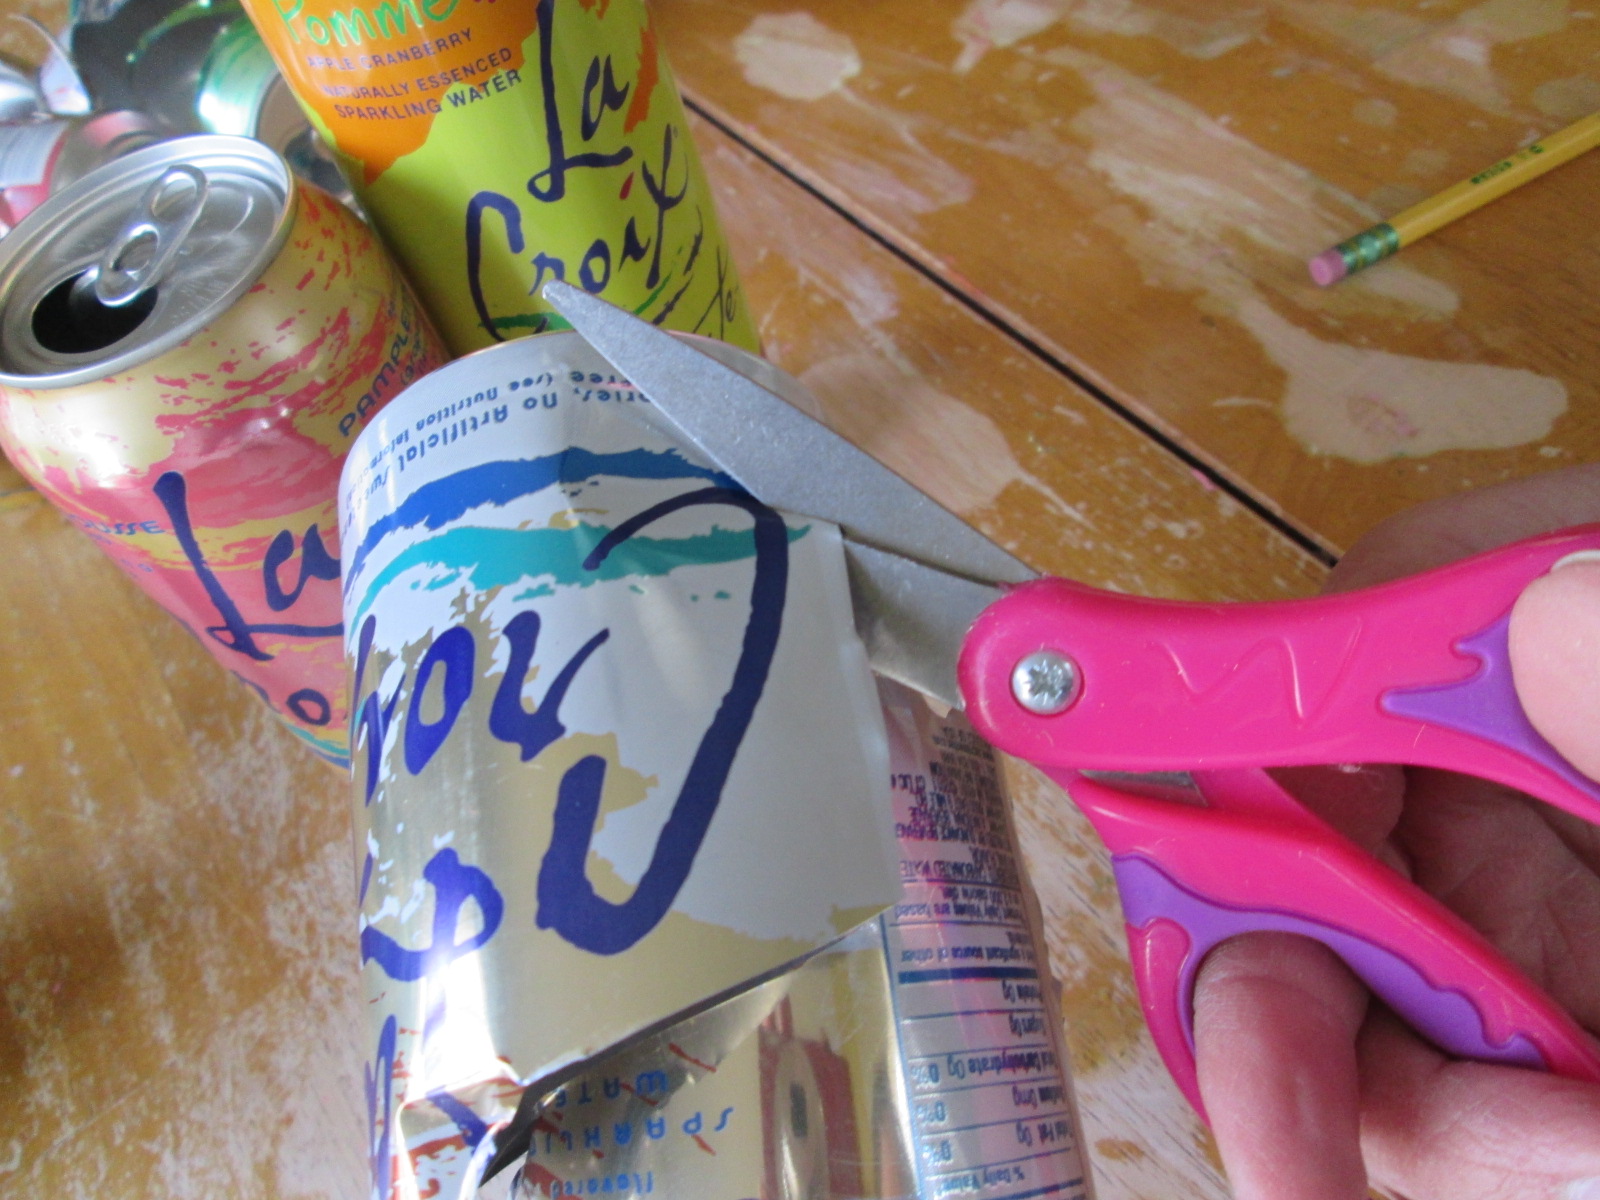
I did not cut myself while handling the metal, but I would not recommend this project for kids. If you want to do a similar project with kids, you can use these same techniques with paper and get amazing results.
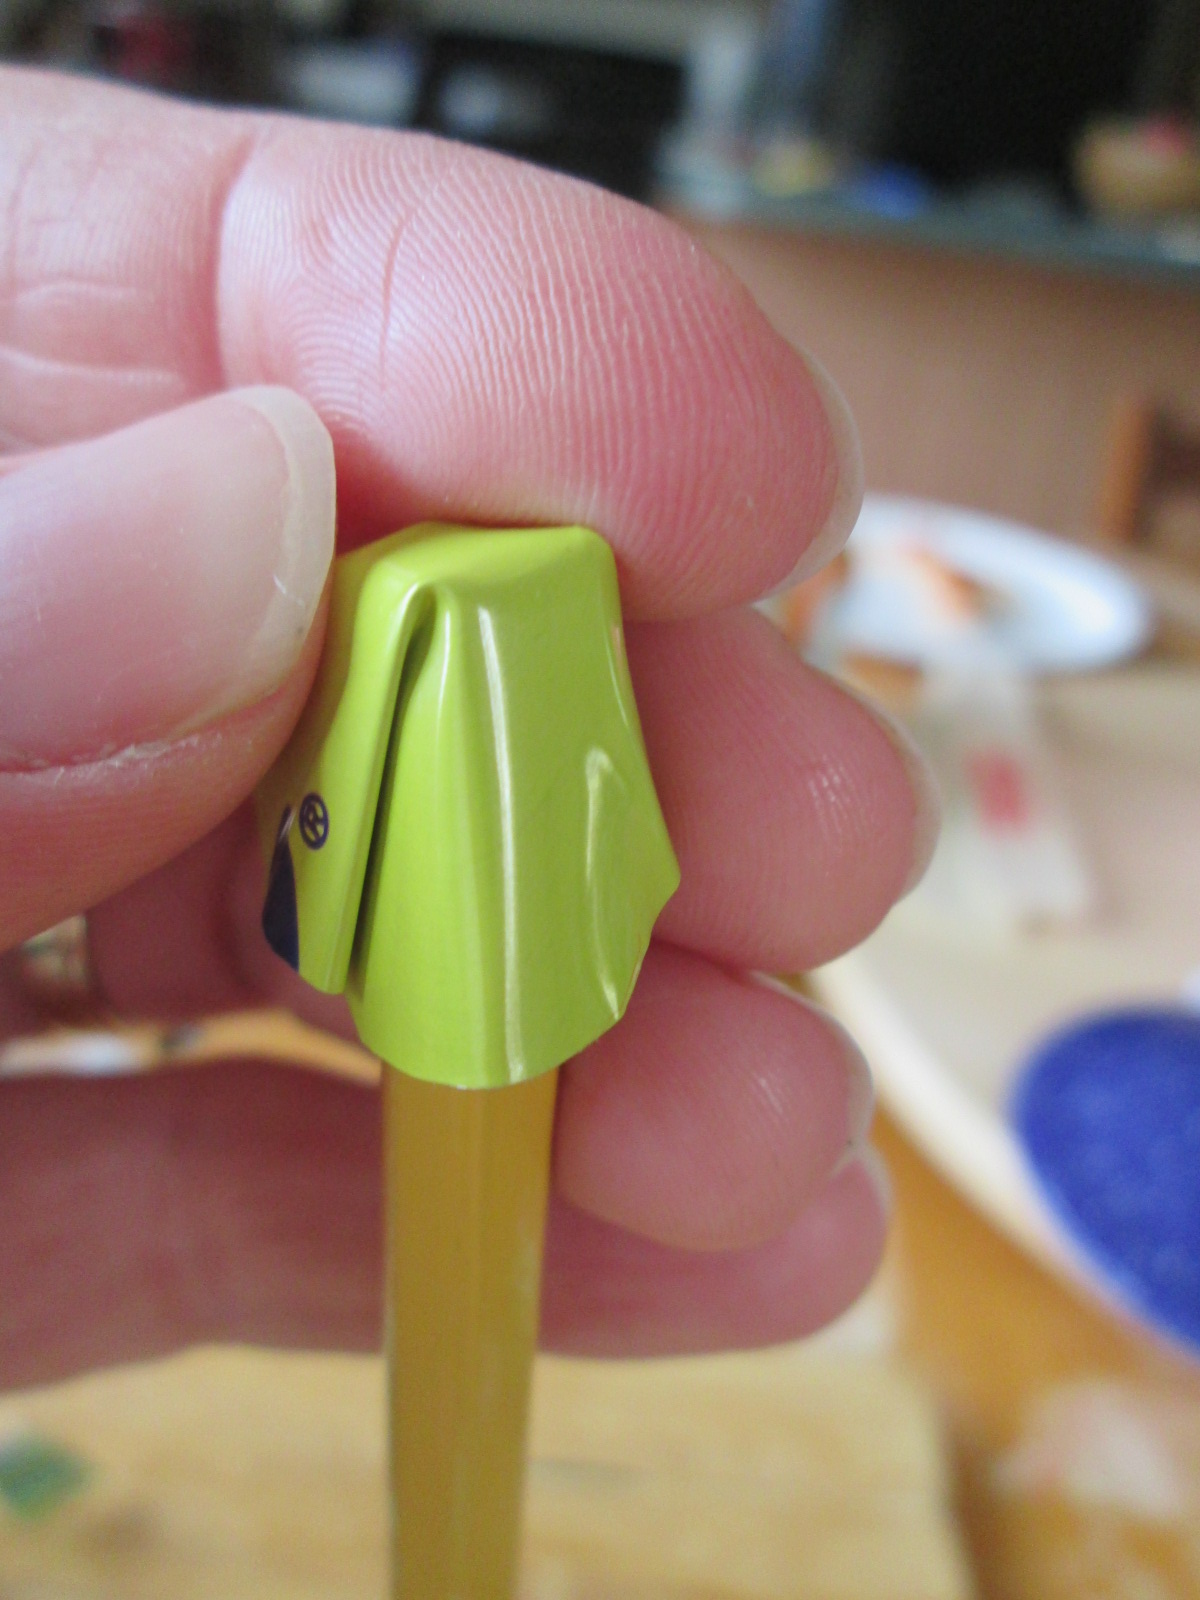
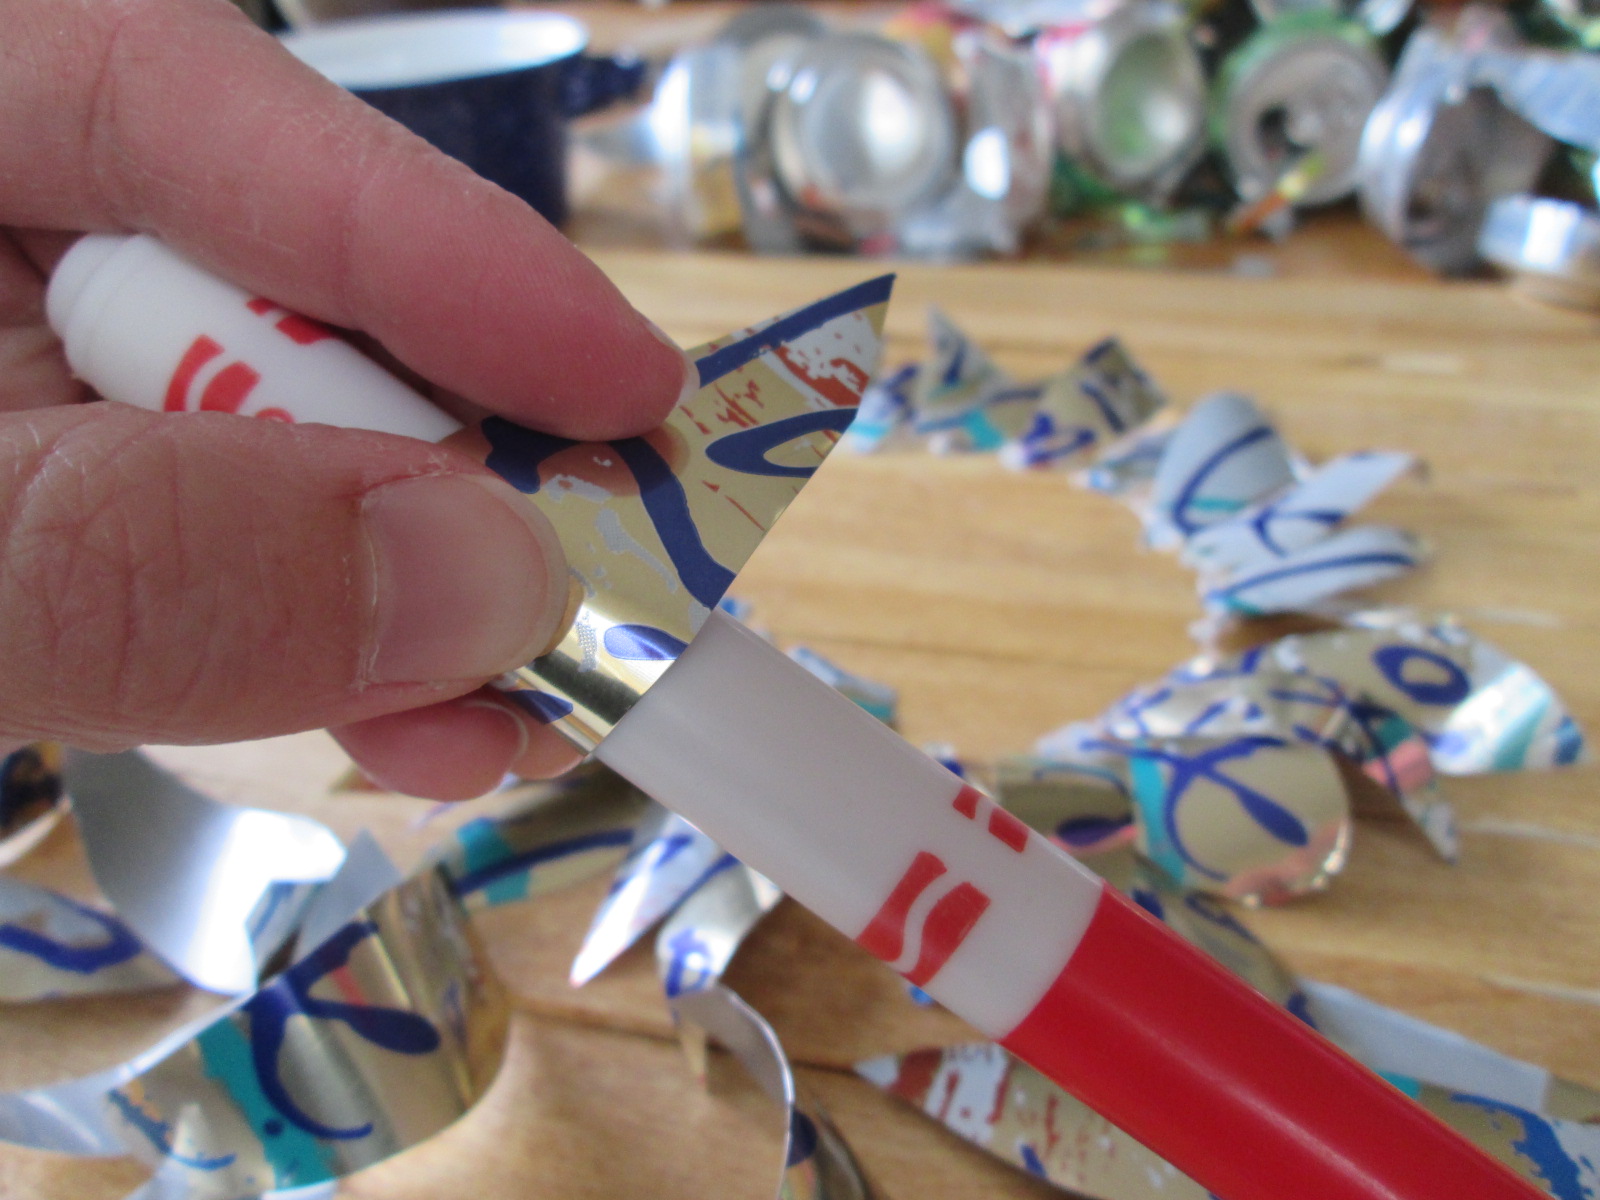
Step 2: Shape the Pieces. To make your can art really pop, (it had to be punned) use a variety of markers, pencils, and whatever is handy to shape the cut metal pieces. I wrapped my green strips around a pencil to make curly stems.
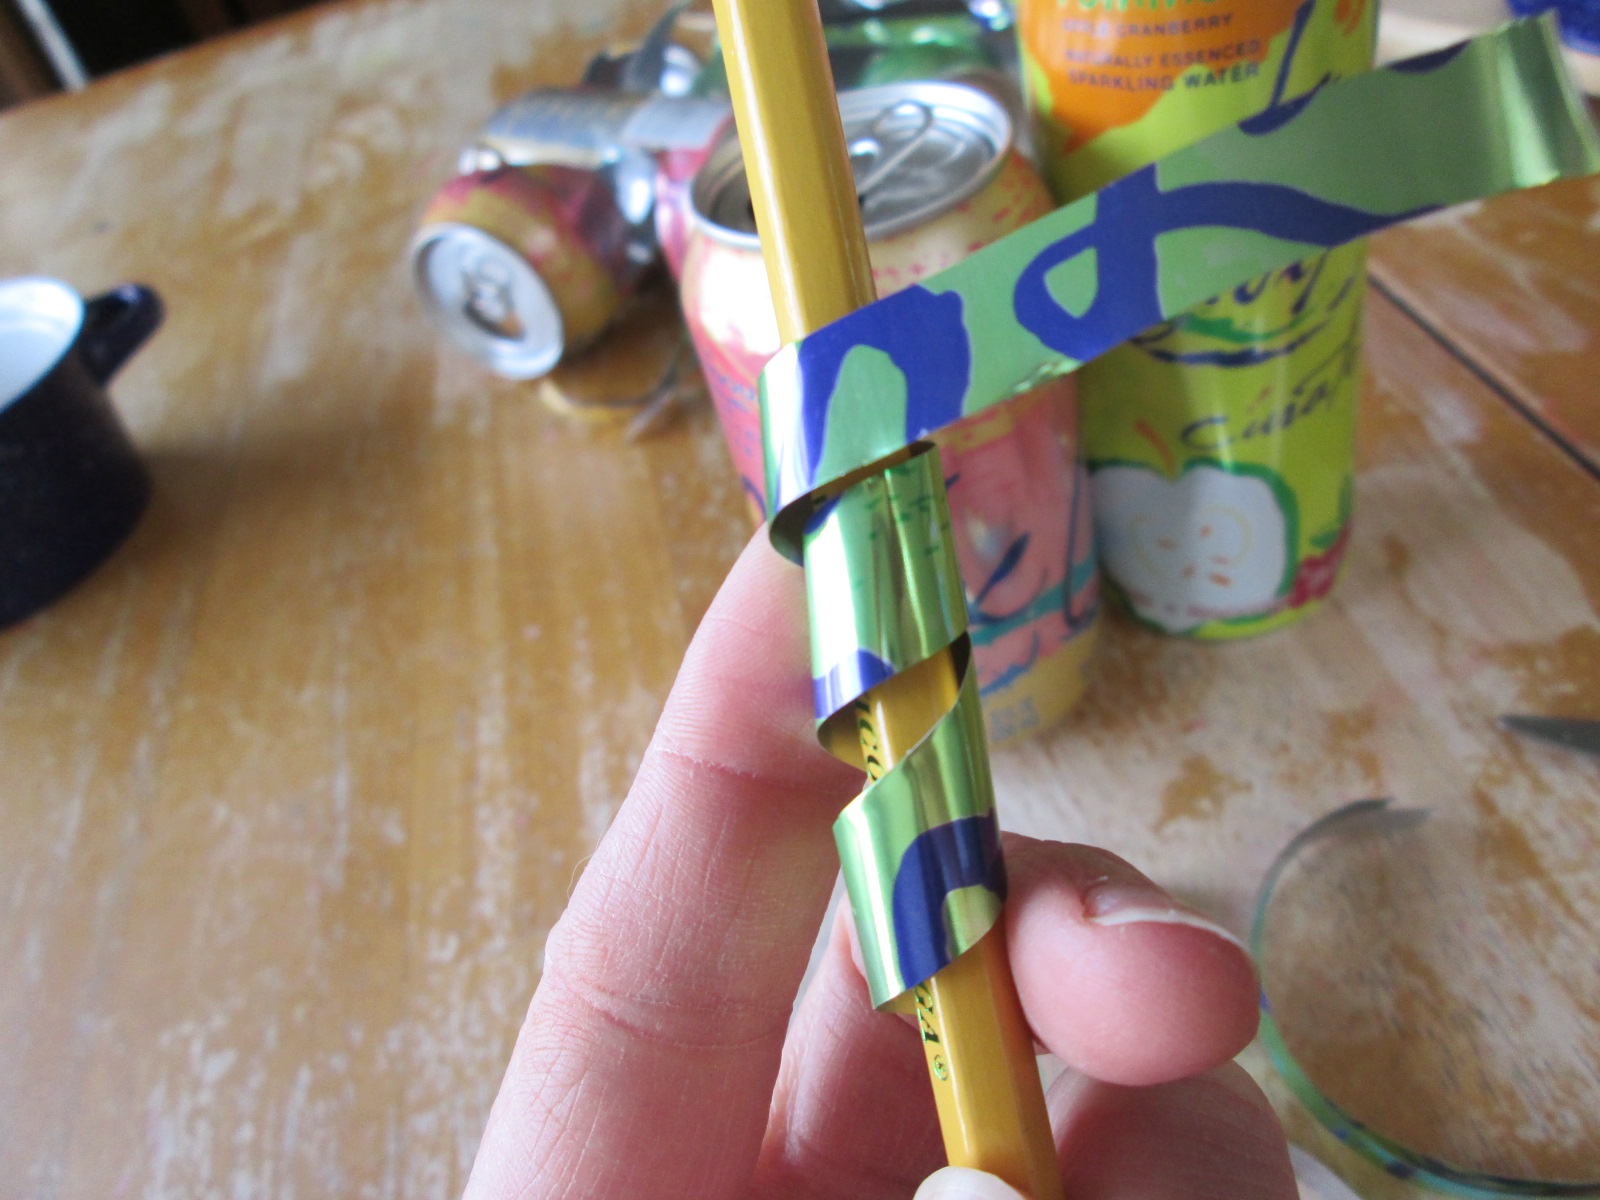
I cut circles of yellow and wrapped them over the flat top of a pencil to create the centers for pink flowers.
For the bigger petals, I used a marker to make a softer look.
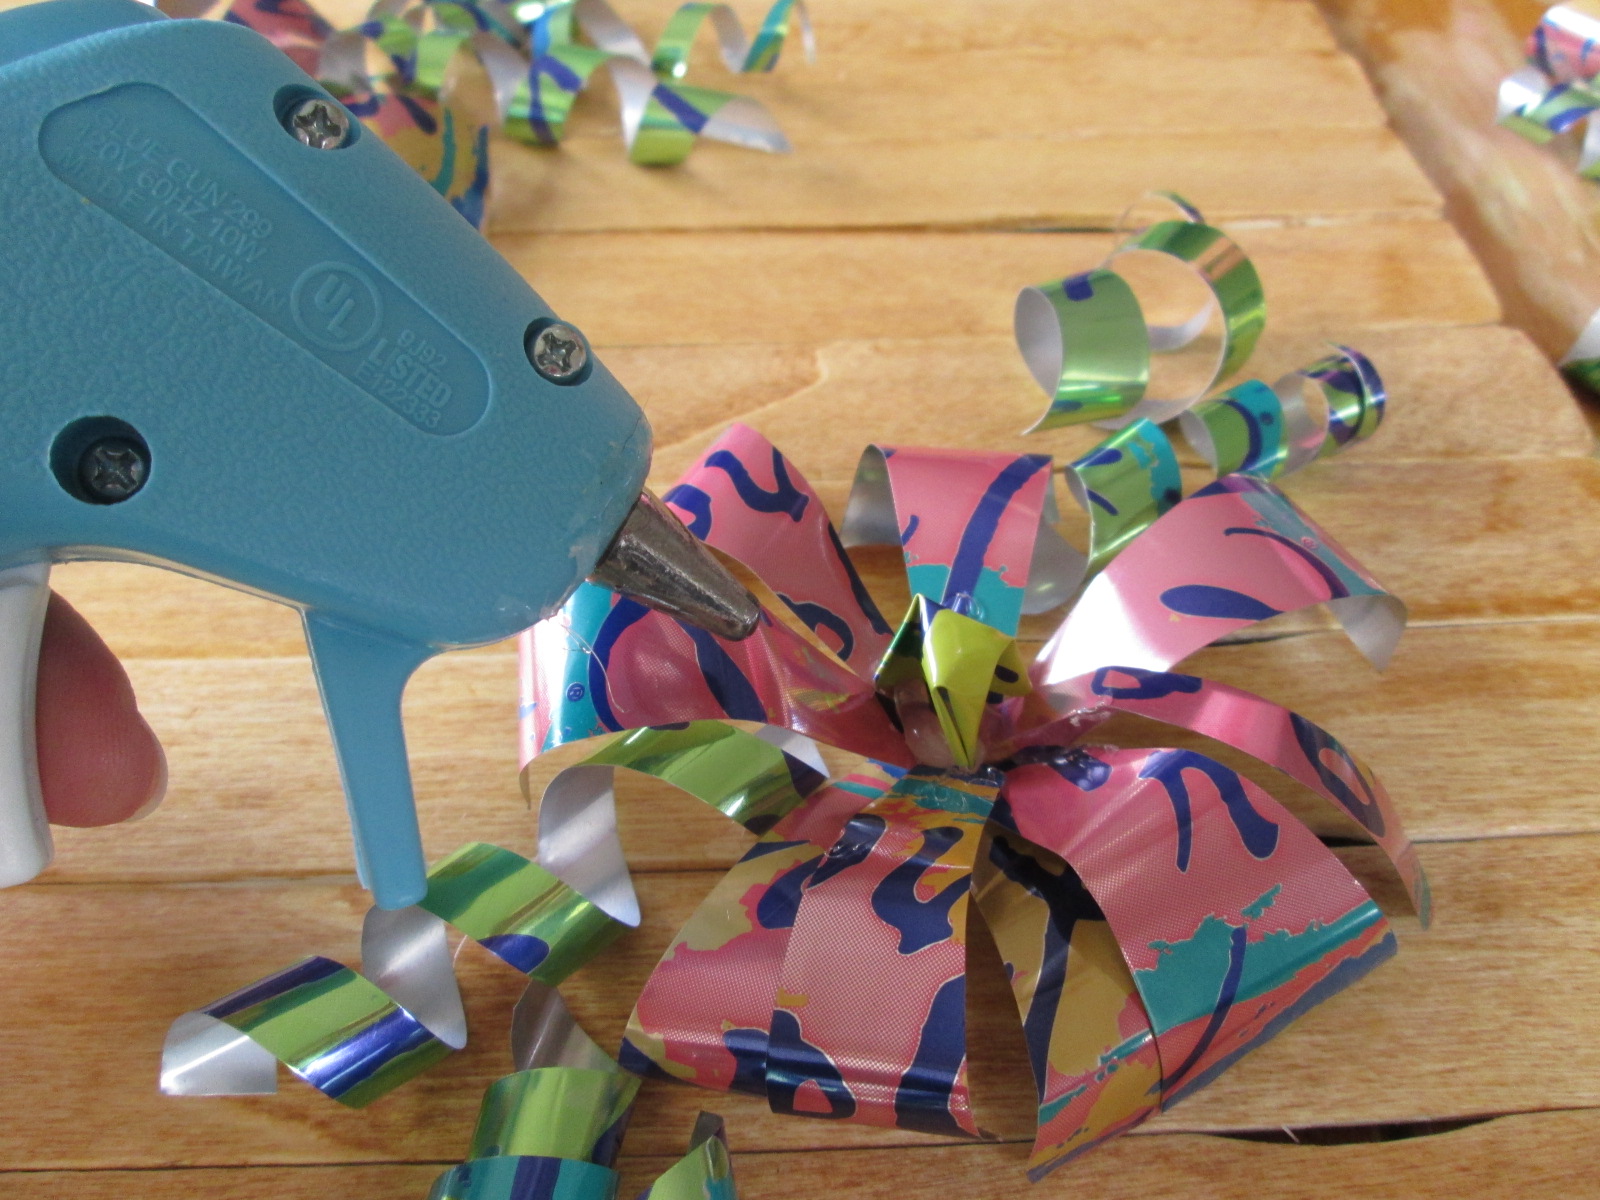
Step 3: Glue the Metal. After your pieces are ready, hot glue them to your backdrop. For the large flower, I started with a big circle (pictured above) to serve as the full circumference of the flower. Working from the outside in, I glued the rows of petals (about half a flower at a time) until I reached the center. A small petal finished the piece.
For the pink flowers, I glued the pink petals in a small circle first, and then I dotted the yellow centers with hot glue to secure them in the middle.
Glue a wire or string on the back, and it’s ready to hang on the wall! Like all art, this has endless possibilities. Have fun using your imagination. Enjoy your day, and invent your story!